


Getting your watch bracelet to fit isn't just about comfort—it's about protecting your investment and making sure your timepiece looks its best. The whole point is to get that perfect balance where the watch feels secure, looks great, and becomes a natural extension of your wrist.
We'll walk through everything from measuring your wrist to gathering the right tools and, of course, the careful process of adding or removing links.
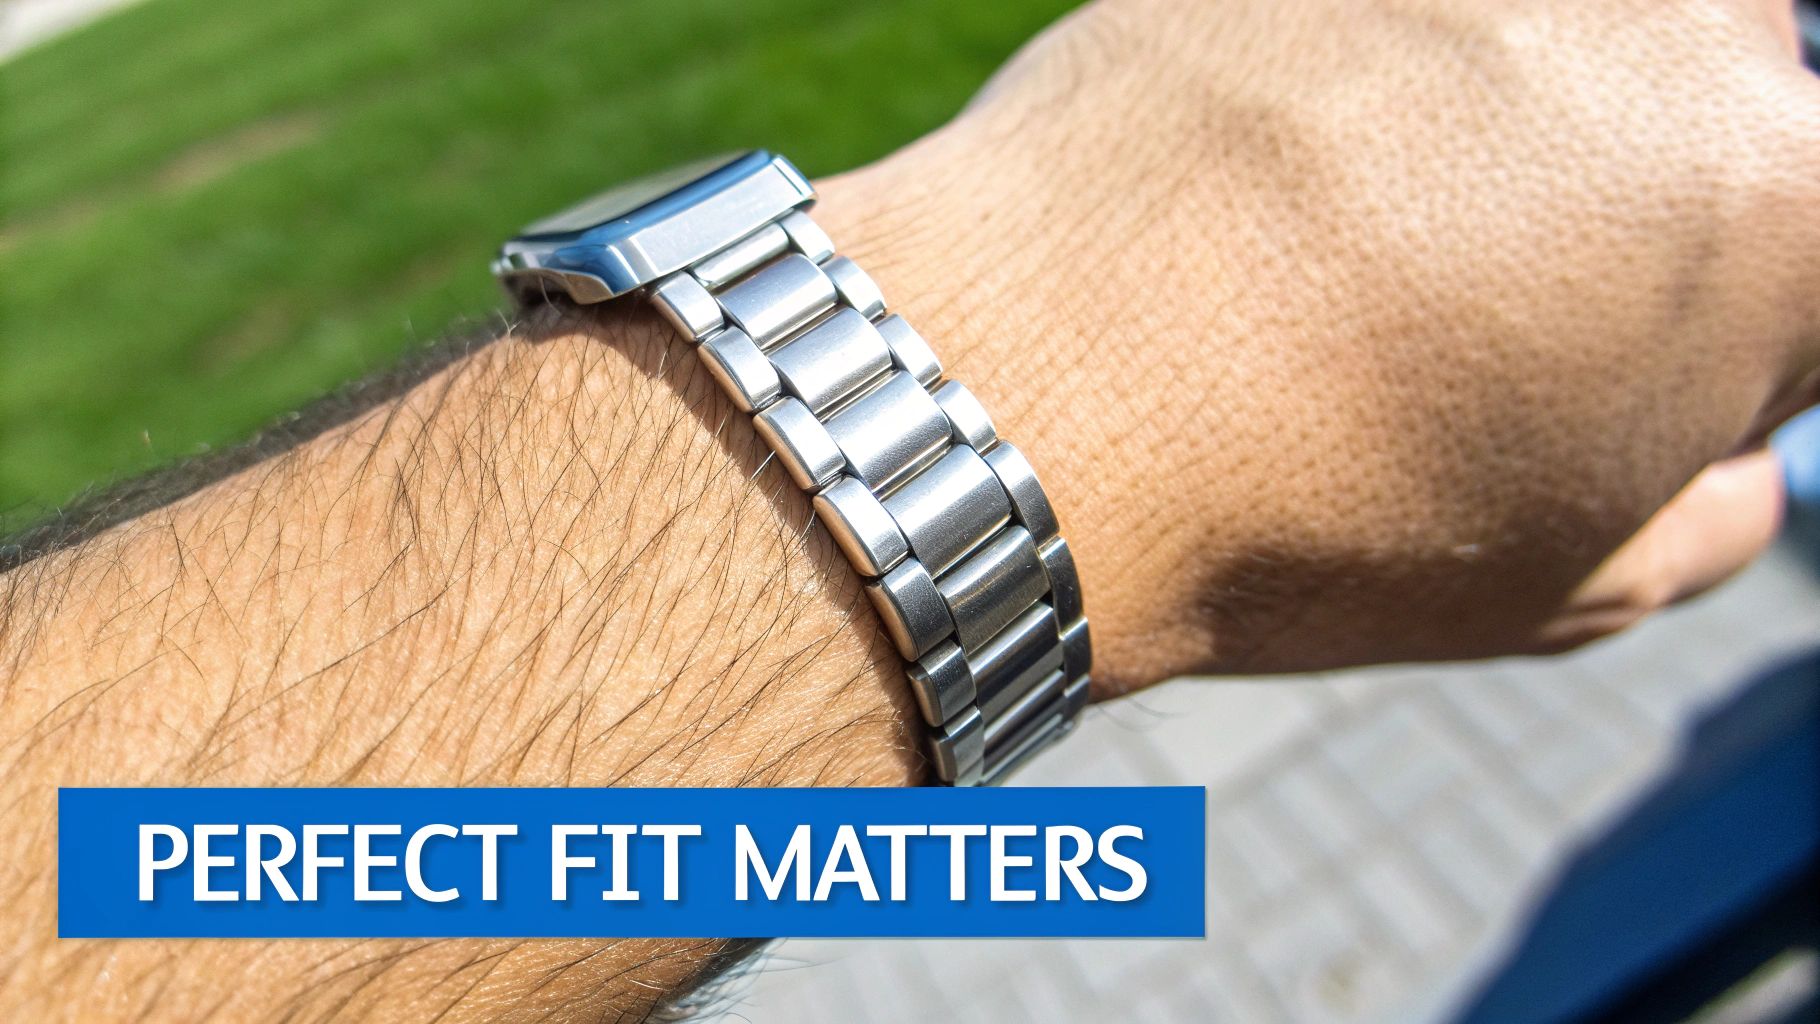
Why a Perfect Fit Matters More Than You Think
A properly sized watch bracelet is the difference between a good ownership experience and a great one. It’s what transforms a beautiful timepiece from something you wear into something that feels like it was made just for you. The gap between "good enough" and "perfect" is huge, affecting everything from comfort to the long-term safety of your watch.
A bracelet that’s too loose is a real hazard. It will slide up and down your arm, letting the clasp and links get scuffed and scratched on desks, zippers, and just about everything else. Even worse, a loose watch can easily snag on something, which could lead to a catastrophic drop.
On the other hand, a bracelet that's too tight is just plain uncomfortable. It can dig into your skin, cut off circulation, and leave those annoying marks. This becomes a real issue as your wrist naturally expands and contracts with changes in temperature and activity throughout the day.
The Financial and Aesthetic Impact
This isn't just a matter of opinion; the numbers back it up. In a global watch market valued at USD 66.38 billion in 2024, how a watch fits is directly tied to customer satisfaction. In fact, ill-fitting bracelets are responsible for a surprising 22% of returns in online sales. A well-fitted watch is also perceived as being 40% more valuable—it just looks right.
A correctly centered clasp and a bracelet that conforms to your wrist shape don't just feel better—they present the watch as it was designed to be worn. The aesthetics are just as important as the ergonomics.
Finding the Balance
The goal is to find that sweet spot. The classic rule of thumb is that you should be able to slide one finger between the clasp and your wrist. This gives you enough room for daily fluctuations without letting the watch head flop around.
This principle is universal, whether you're adjusting a daily beater or a luxury icon from a top brand. Knowing the little details of a specific brand, like those covered in our comprehensive Rolex watch size guide, can make a world of difference.
It’s a lot like understanding the significance of chain length in jewelry to make sure a necklace drapes perfectly. Taking a few minutes to learn how to size your own bracelet not only saves you a trip to the jeweler but also connects you more deeply with your timepiece.
Before we dive into the how-to, here's a quick reference to help you visualize the goal.
Quick Sizing Reference Chart
This table gives you a general idea of wrist sizes and the target fit you're aiming for. It's a great at-a-glance guide to keep in mind as you start the sizing process.
| Measurement Area | Average Size (Male) | Average Size (Female) | Recommended Fit |
|---|---|---|---|
| Wrist Circumference | 7.25 inches (18.4 cm) | 6.5 inches (16.5 cm) | Snug but not tight |
| Below Wrist Bone | Varies by individual | Varies by individual | Watch should sit comfortably |
| Gap Under Clasp | N/A | N/A | Space for one index finger |
| Bracelet Movement | N/A | N/A | Minimal sliding, no spinning |
Remember, these are just averages. Your own wrist is unique, so use these numbers as a starting point, not a strict rule. The ultimate test is how it feels and looks on you.
Assembling Your Watch Sizing Toolkit
Before you even think about touching a single link, the most important step is getting your tools in order. Trust me on this one. Trying to size a bracelet with whatever you have lying around is the #1 reason people end up with ugly scratches, bent pins, and stripped screw heads. Think of it as a pre-flight check; a few minutes of prep will save you a world of pain later.
You don't need a full-on watchmaker's bench, but a few specific tools are non-negotiable. These aren't just suggestions. They're designed to handle the tiny, delicate parts of your bracelet with a precision a thumbtack or a pair of pliers could never match. A small investment in a basic, quality kit is really an investment in protecting your watch.
The Essential Toolkit Breakdown
At the heart of it, bracelet links are held in place two ways: with friction pins or with tiny screws. Your first job is to figure out which system your watch uses, because that will tell you exactly which tool you need to grab first.
For most bracelets, a pin pusher is fundamental. This is a small handheld tool with a fine metal point made specifically for pushing those friction pins out of the links. It’s best used with a bracelet holding block—a little plastic or nylon block with slots that holds the bracelet steady so you can work on it without it slipping.
Using the right tool for the job is everything. A study on amateur watch repairs found that over 60% of damage happened simply because the wrong tool was used. Improvised pushers like paper clips or thumbtacks were the main culprits.
If your watch bracelet uses screws, you'll need a set of precision screwdrivers. These are not the same as the ones in your garage toolbox. They have incredibly fine, flat-head tips sized for watch screws. Using one that's even a fraction too big or small is a surefire way to strip the screw head, turning a five-minute job into a trip to the repair shop.
Here’s a quick look at the core tools your kit should have:
- Bracelet Holding Block: Secures the bracelet vertically, letting you apply steady, even pressure. No slipping.
- Pin Pusher or Sizing Tool: This could be a simple handheld pusher or a more advanced screw-down tool that gives you more control when forcing a pin out.
- Small Jeweler's Hammer: A very lightweight hammer, usually with one brass and one nylon head. You'll use it to gently tap pins back into place without causing damage.
- Precision Screwdrivers: A set with various sizes (like 1.0mm, 1.2mm, and 1.4mm) is crucial for any bracelet with screw-in links.
- Spring Bar Tool: This little forked tool is a must-have for making micro-adjustments at the clasp or for removing the bracelet from the watch case entirely.
Helpful Extras for a Flawless Finish
Beyond the absolute essentials, a few other items can take your setup from just functional to truly professional. These are the small things that experienced collectors and enthusiasts swear by because they make the job easier and safer.
First, always work on a soft, padded surface. A watchmaker's mat is great, but a piece of felt or even a soft microfiber cloth works perfectly. This protects your watch case, crystal, and bezel from getting scuffed up while you’re focused on the bracelet.
Next, get some low-tack masking tape, like painter's tape. Apply small pieces to the links right next to the one you're working on. It’s a simple but brilliant buffer. If your tool slips, it hits the tape, not the polished metal. This trick has saved countless bracelets from ugly marks.
Finally, keep a small, clear container or a magnetic parts tray nearby. The pins, collars, and screws you’re removing are ridiculously tiny and love to disappear. Having a dedicated spot for them means nothing gets lost. This simple organizational step can prevent the sheer panic of trying to find a microscopic pin collar that just rolled off your desk into another dimension.
Adjusting Common Bracelet Link Systems
Alright, with your toolkit ready, it's time to get your hands on the bracelet. The secret to a clean, scratch-free adjustment is knowing exactly what you're working with. While brands love their proprietary designs, almost every bracelet boils down to one of two systems: the old-school friction pin or the more modern threaded screw.
Each type demands a slightly different touch and the right tool for the job. Get it wrong, and you're looking at a stuck pin, a stripped screw head, or an ugly scratch that will haunt you forever. I'll walk you through both, sharing a few tricks I've picked up over years of sizing my own watches.
This simple infographic breaks down the workflow I use for every adjustment. It keeps the process clean, organized, and safe.
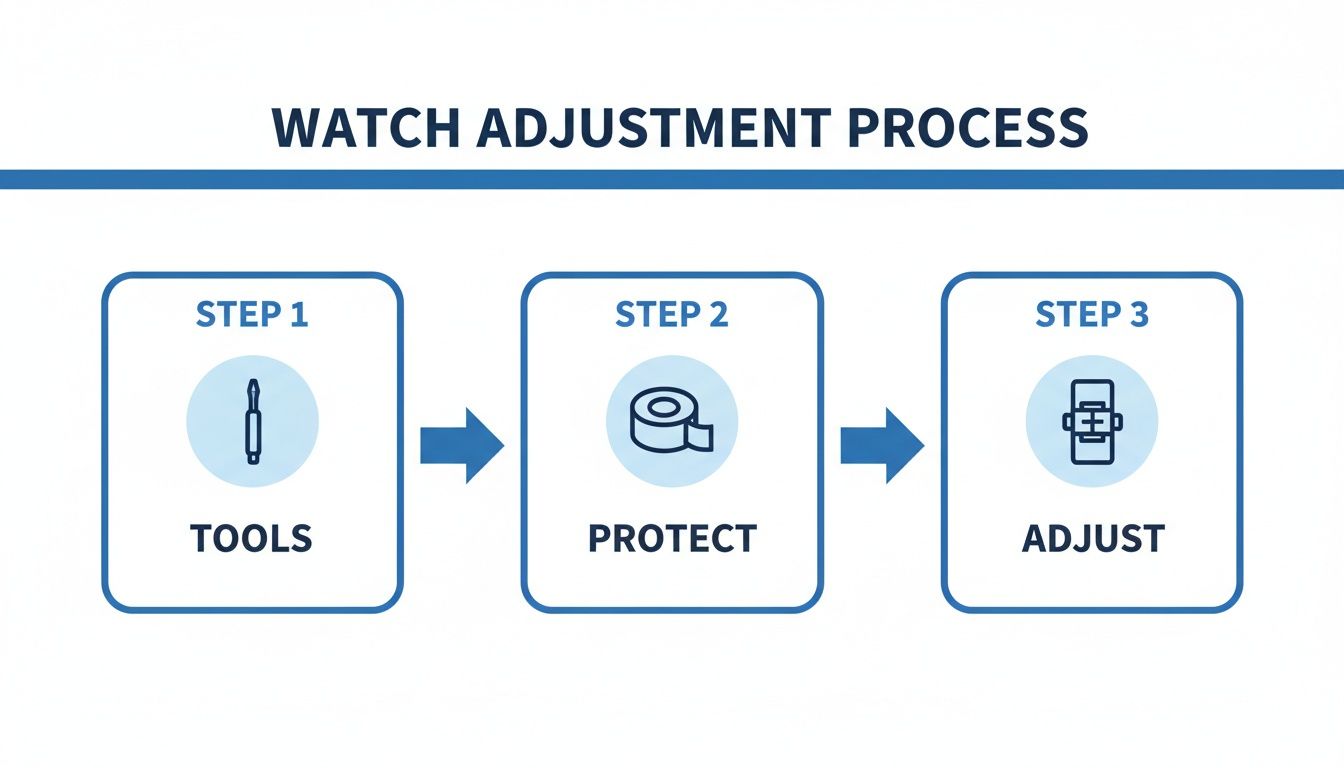
The idea is to break the job into three phases: get your tools ready, protect the watch, and then make your adjustments. Following this simple sequence minimizes the chances of a costly slip-up.
Mastering the Friction Pin System
The friction pin—sometimes called a "split pin" or "cotter pin"—is a classic. You'll find it on countless watches, especially vintage pieces and many modern tool watches. It’s a beautifully simple system that just uses tension to hold the links together.
Figuring out if you have one is easy. Flip the bracelet over and look at the inside of the links. You’ll see small, recessed circles. Often, you'll also spot tiny arrows stamped right into the steel.
Pay close attention to those arrows. They are your non-negotiable guide, showing you the only direction to push the pin out. If you try to force a pin against the arrow, you'll only wedge it in tighter and risk damaging the link.
Here’s the right way to remove friction pins:
- Seat the bracelet in your holding block, making sure the pin you’re removing is lined up over an open slot.
- Get your pin pusher tool perfectly centered on the pin head.
- Apply slow, steady pressure. Some pins are stubborn, so a gentle tap from your jeweler's hammer might be needed to get things moving.
- Once it's pushed partway out, you can usually grab it with your fingers or a pair of pliers. Just remember to wrap the plier jaws in tape or a cloth to prevent scratches.
Pro Tip: Watch out for the tiny collar system used by brands like Seiko and Citizen, especially on their dive watches. When you push the pin out, a minuscule metal tube (the collar) located in the center of the link can fall out. These things are incredibly easy to lose, so always work over a tray to catch any escapees.
Putting it back together is just the reverse. Slide the pin back in—against the direction of the arrow—and tap it gently until it sits flush with the side of the link. If you have that tiny collar, make sure it’s back inside the link before you reinsert the pin.
Working with Threaded Screw Links
Threaded screw links are the standard for most modern luxury watches. Instead of a tension-fit pin, a tiny flathead screw secures the links. You'll see this system on watches from Rolex, Omega, and Audemars Piguet because of its security and serviceability. If you want to go deeper on these high-end bracelets, our guide to Rolex bracelets is a great resource.
The number one mistake people make here is using the wrong size screwdriver. A tip that's too small will spin and strip the screw head instantly. One that's too big won't sit flat, marring the screw and the link itself. Precision is everything.
From the factory, manufacturers often apply a dab of thread-locking compound (like Loctite) to keep the screws from backing out. This can make them feel seized up the first time you try to remove them. If you feel serious resistance, don't just muscle through it.
A little bit of gentle heat is the trick to loosening that compound.
- A hairdryer on low, aimed at the link for 15-20 seconds, is usually all it takes.
- You can also dip the link in warm water, but only do this if you're certain your watch is water-resistant.
Once the compound softens, the screw should turn smoothly. Unscrew it, pop it in your parts tray, and repeat for the other links. When you're reassembling, just tighten the screws until they're snug—don't crank them down like you're changing a car tire. You want them secure, not stripped. For extra security, a tiny drop of low-strength (purple) thread-locker on the threads is a good idea.
The move toward user-adjustable links has been a massive quality-of-life improvement for watch owners. It’s a big reason the wrist watch strap market is projected to hit $1.2-1.5 billion by 2025. Historically, when modular links became common in the 1970s alongside the quartz boom, global return rates for watches plummeted from around 35% to under 10% by 1985. It just goes to show how critical a perfect fit is.
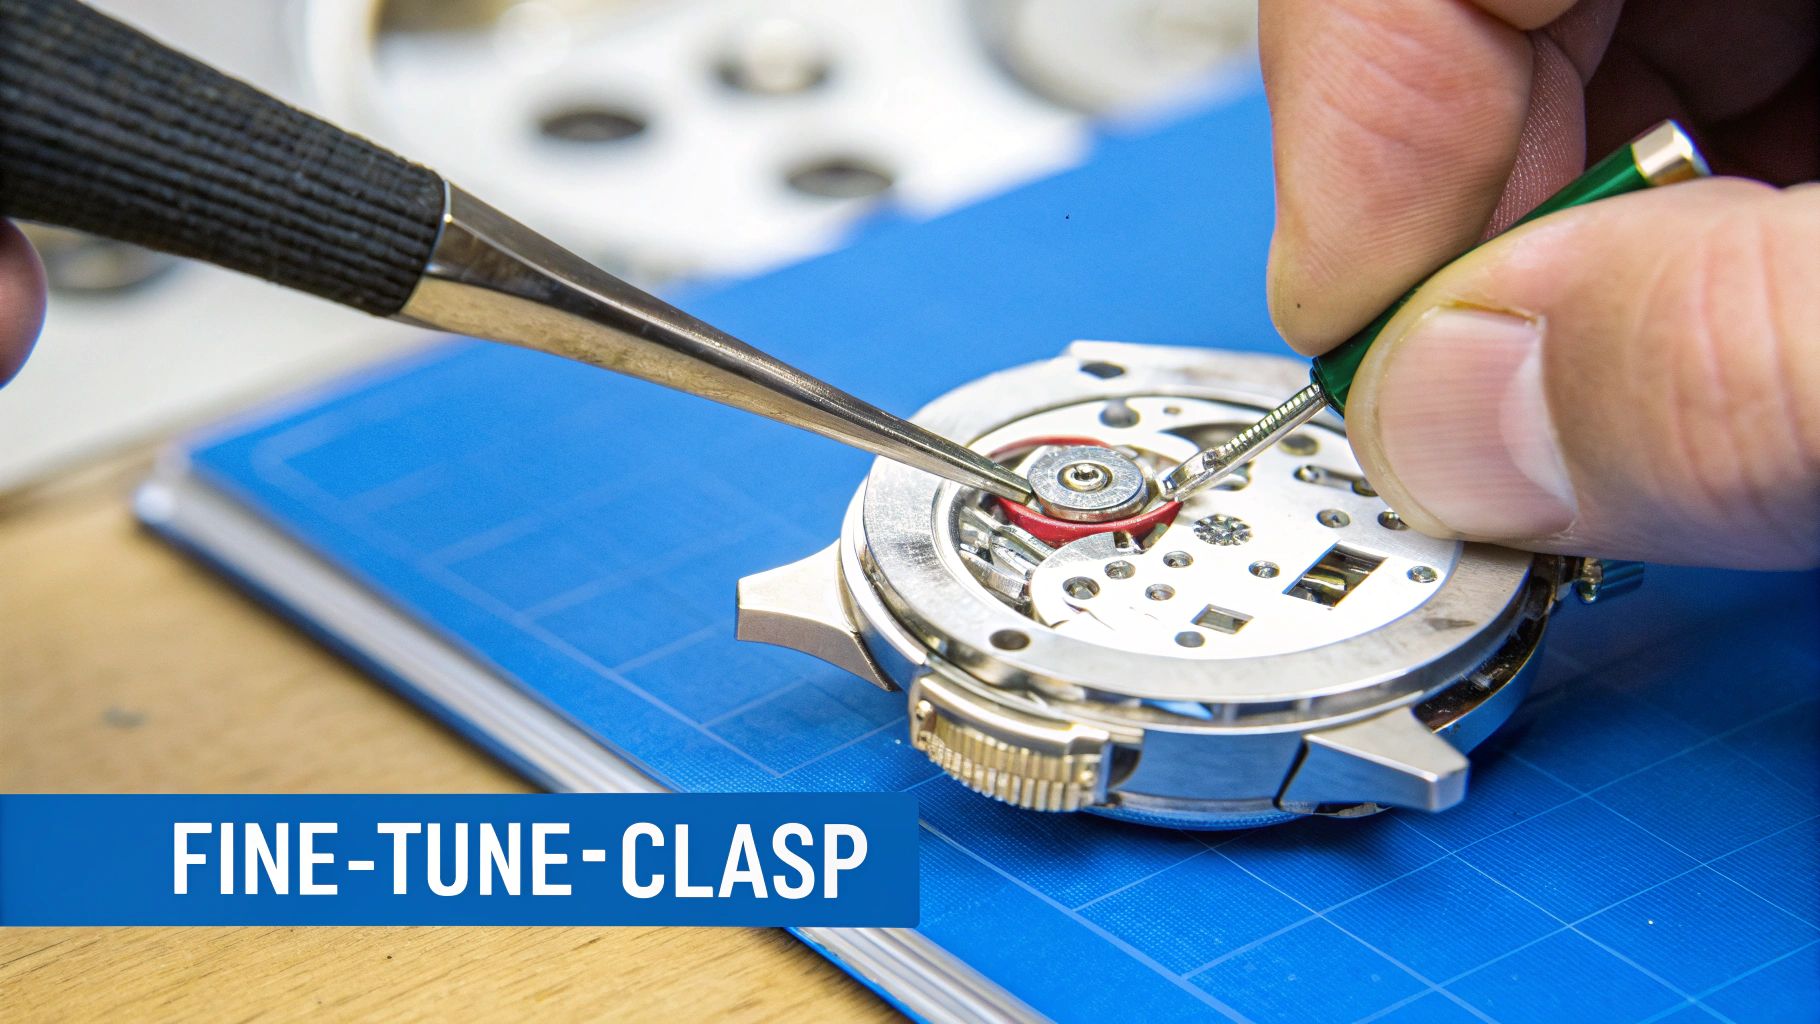
Fine-Tuning the Fit at the Clasp
Getting the link count right gets your watch bracelet about 90% of the way there. But the secret to that perfect, forget-it's-on-your-wrist feeling? That comes from the small, precise adjustments you can make right at the clasp.
This is the final touch that takes a fit from "pretty good" to truly dialed in. Think of link removal as the broad strokes. The micro-adjustments are the fine-tuning that accounts for how your wrist naturally swells and shrinks with changes in temperature, hydration, and activity. This is what makes a watch comfortable all day long.
Standard Clasp Micro-Adjustments
Take a look at most standard watch clasps and you'll see a series of small pinholes running along the sides. These are your best friends for nailing the perfect size. By moving the spring bar that connects the bracelet to the clasp, you can add or remove a few crucial millimeters of length without messing with the links.
Your spring bar tool is the hero here.
- Grab the tool and use the small forked end.
- Wedge the fork between the clasp wall and the bracelet, finding the end of the spring bar.
- Gently push to compress the spring bar, then guide it out of the pinhole.
- Repeat on the other side, and the bracelet will detach from the clasp.
- To reattach, just do the reverse. Slot one end of the spring bar into your desired new hole, compress the other end, and slide it into place. You should hear and feel a satisfying little "click" as it locks in.
Pro Tip: Always give the bracelet a firm but gentle tug after you re-seat the spring bar. You want to be absolutely sure it’s secure. A partially set spring bar is the number one cause of a watch unexpectedly falling off your wrist.
Advanced On-the-Fly Adjustment Systems
Step into the world of modern luxury and high-end dive watches, and you'll find brilliant, tool-free adjustment systems. These are an absolute game-changer, letting you adapt the fit instantly as your day changes. With global demand for watch bands hitting 174 million units in 2024, it's no surprise that brands are investing heavily in this kind of user-focused engineering. In fact, when Rolex introduced its first modern micro-adjust clasps in 1988, it reportedly slashed return rates by an incredible 40%. You can dig into more data on the wearable band market to see the trend.
Many top-tier brands have their own proprietary systems, but here are a few of the best-known examples:
- Rolex Glidelock: Found on the Submariner and Sea-Dweller, this is widely seen as the industry benchmark. You just lift a segment of the clasp, slide the bracelet along a finely toothed track, and snap it shut. It provides up to 20mm of adjustment in tiny 2mm steps.
- Omega Push-Button Clasp: A staple on many Seamaster divers, this system uses a small pusher hidden inside the clasp. Press it, and you can instantly extend the bracelet by a few millimeters for some extra breathing room.
- Tudor Pelagos Clasp: This one is especially clever. It offers three standard micro-adjust positions plus a patented spring-loaded, self-adjusting mode. It was designed to automatically compensate for wetsuit compression at depth, but it works just as well for accommodating daily wrist size changes on dry land.
Mastering these systems takes seconds because they're designed to be completely intuitive. Whether you're tightening the fit before a swim or loosening it after a long, hot day, this is the final piece of the puzzle. Getting this right is what ensures your watch is not just secure, but perfectly comfortable from morning to night.
Knowing When to See a Professional
Learning to adjust your own watch bracelet is a satisfying skill, but knowing when to put the tools down is just as important. There are definitely times when the smartest move is to let an expert take over. Pushing ahead when you shouldn't can lead to some seriously expensive—and irreversible—damage.
Sometimes, the risk of a DIY adjustment just isn't worth it. This is especially true for watches with incredibly complex or proprietary bracelet designs. Take the iconic integrated bracelet of an Audemars Piguet Royal Oak; it’s an engineering marvel, but it’s completely unforgiving of mistakes. One slip of a tool could gouge those finely brushed and polished surfaces, a mistake that would require a costly trip back to the factory to fix.
Red Flags That Signal It's Time for an Expert
The same caution goes for bracelets made from precious metals like gold, platinum, or even titanium. These materials are much softer and more prone to deep scratches than stainless steel. The financial fallout from a mistake on a solid gold Patek Philippe bracelet is something you don't want to experience firsthand.
Another clear sign to stop is a stubborn pin or screw. If a component refuses to budge with firm, reasonable pressure, there's a reason. It might be seized from corrosion or locked in with a strong thread-locking compound that requires a watchmaker's specific techniques to loosen safely.
Applying brute force is the fastest way to break a tool, bend a link, or strip a screw head. Once a screw is stripped, getting it out becomes a far more invasive job that belongs in the hands of a professional.
Think of it as a calculated decision. Here are a few scenarios where handing your watch to a pro is the right call:
- High-Value Timepieces: If your watch is a major investment (Rolex, Patek Philippe, Audemars Piguet), the peace of mind you get from a professional service is well worth the cost.
- Stuck or Seized Parts: A pin or screw won't budge even after gentle heating and using the proper tools. Don't force it.
- Precious Metal Bracelets: Gold, platinum, and titanium are much less forgiving of slips and scratches.
- Complex Integrated Bracelets: Designs that don't use simple pin or screw systems need specialized knowledge and tools.
Finding a reputable watchmaker ensures the job is done right, protecting your investment. If you're looking for expert help, the personalized service offered through our ECI Jewelers watch concierge can connect you with specialists who handle these delicate tasks every single day. Ultimately, knowing when to tackle the job yourself and when to call in a professional is the mark of a truly knowledgeable watch owner.
Common Questions on Sizing Watch Bracelets
Even with the best instructions, a few questions always pop up when you're learning how to size a watch bracelet. It's completely normal. Getting the fit just right often means troubleshooting small details that make a huge difference in how the watch wears.
Here, I'll walk through some of the most frequent questions we hear from clients. My goal is to give you clear, practical answers that build on what we’ve already covered, helping you tackle common hiccups with confidence.
How Tight Should My Watch Bracelet Feel?
This is the big one, and the answer is all about finding the perfect balance. Your watch should be snug enough that it doesn't spin freely around your wrist, but loose enough that it never leaves a deep mark on your skin.
The classic test is simple and effective: see if you can slide your pinky finger between the clasp and the underside of your wrist without a struggle. If you can, you're probably in the sweet spot. The watch should sit comfortably just below your wrist bone without feeling tight.
Remember, your wrist size can fluctuate by as much as a quarter-inch throughout the day due to things like temperature and hydration. A great fit accounts for this, keeping the watch comfortable from morning to night.
If the watch head is sliding from one side of your wrist to the other, it's definitely too loose. On the other hand, if you can feel your pulse under the bracelet or see red indentations when you take it off, it's far too tight.
Should I Remove Links Evenly from Both Sides?
Absolutely. This is critical for both comfort and looks. Always start by removing an equal number of links from the 6 o'clock and 12 o'clock sides of the bracelet.
Doing this keeps the clasp centered on the soft underside of your wrist, right where it's designed to be. A centered clasp prevents the watch head from pulling awkwardly to one side and makes sure the weight is distributed evenly.
So, what do you do if you need to remove an odd number of links, like three or five?
- Start by taking an equal number from each side (for example, if removing three, take one from each side first).
- Try the watch on to see how it sits.
- For that last, odd link, my personal recommendation is to remove it from the 6 o'clock side.
Taking that extra link from the shorter, 6 o'clock end tends to pull the watch case slightly toward you. For most people, this subtle shift helps the watch sit flatter and more securely on the wrist.
I Scratched My Bracelet While Sizing It—What Now?
First off, don't panic. It happens to the best of us, especially when you're just starting out. The good news is that minor scuffs are usually fixable, but the right method depends entirely on the bracelet's finish.
For Brushed Finishes:
You can sometimes blend minor hairline scratches on brushed steel with a specialized refinishing pad or even a green Scotch-Brite pad. The key is to always rub gently and in the same direction as the original brushed grain. Go against the grain, and you'll only make it worse.
For Polished Finishes:
Highly polished surfaces are much less forgiving. For the lightest surface marks, a jeweler's cloth, like a Cape Cod Polishing Cloth, can work wonders. Use extremely light pressure in small, circular motions to buff out the blemish.
But if the scratch is deep enough to catch your fingernail, or if you're working with a complex finish (like the mix of brushed and polished surfaces on a Royal Oak), the safest move is to stop. Bring it to a professional. A skilled watchmaker has the proper tools and expertise to restore the finish perfectly without ruining the bracelet's sharp lines.
What Are Half-Links and When Do I Use Them?
Think of half-links as your secret weapon for a truly custom fit. They're exactly what they sound like: smaller links, usually about 50-75% the size of a standard link, designed for fine-tuning.
You'll need a half-link when you're stuck "between sizes." It’s that frustrating spot where taking out a full link makes the bracelet too tight, but putting it back in makes it just a little too loose, even after you've used all the micro-adjustments in the clasp.
Many brands include one or two half-links with the watch. If yours didn't, you can often buy them directly from the manufacturer or an authorized dealer. Swapping a full link for a half-link can add or remove just a few crucial millimeters—often all it takes to go from a good fit to a perfect one. They're a game-changer for all-day comfort.
At ECI Jewelers, we understand that a perfect fit is essential to enjoying your luxury timepiece. Whether you need expert advice on sizing your new Rolex or professional service for a delicate adjustment, our team is here to help. Explore our curated collection of the world's finest watches at https://www.ecijewelers.com and experience our commitment to quality and service.


